Tests d'accessibilité Asana : flux de travail plus rapides et structurés
Asana
Pas sûr de quoi faire ensuite avec l'IA?Évaluez la préparation, les risques et les priorités en moins d'une heure.
➔ Téléchargez notre kit de préparation à l'IA gratuit
L’approche mise à jour des tests d'accessibilité d'Asana se concentre sur des listes de contrôle structurées, une automatisation légère et une hiérarchisation disciplinée. En reliant les vérifications WCAG aux tâches et champs personnalisés d'Asana, les équipes parviennent à cibler des problèmes clairs et résolvables plus tôt, réduisent les allers-retours et suivent les résultats, de la découverte à la vérification, dans un flux de travail transparent.
Pourquoi cela est important maintenant
L'accessibilité ne se résume pas à un audit ponctuel. C’est une habitude continue applicable au design, à l'ingénierie et au contenu. Lorsque les tests sont ad hoc, les équipes passent à côté de problèmes prévisibles, comme les étiquettes manquantes ou les mauvais contrastes de couleurs, et les correctifs traînent. Un flux de travail structuré dans Asana raccourcit le cycle entre « trouvé » et « corrigé ».
Quoi de neuf dans l’approche
L'accent est mis sur la clarté, la rapidité et la vérification :
Clarté : Convertir les règles WCAG en une liste de contrôle courte et conviviale pour l'équipe. Chaque vérification devient un modèle de tâche avec des critères d'acceptation.
Rapidité : Ajouter une automatisation légère (contrôles de linting, de contraste, de pièges clavier) pour détecter les problèmes courants avant la révision humaine.
Vérification : Enregistrer des preuves (captures d'écran, clips courts, notes de technologie d'assistance) et marquer les résultats avec des champs personnalisés.
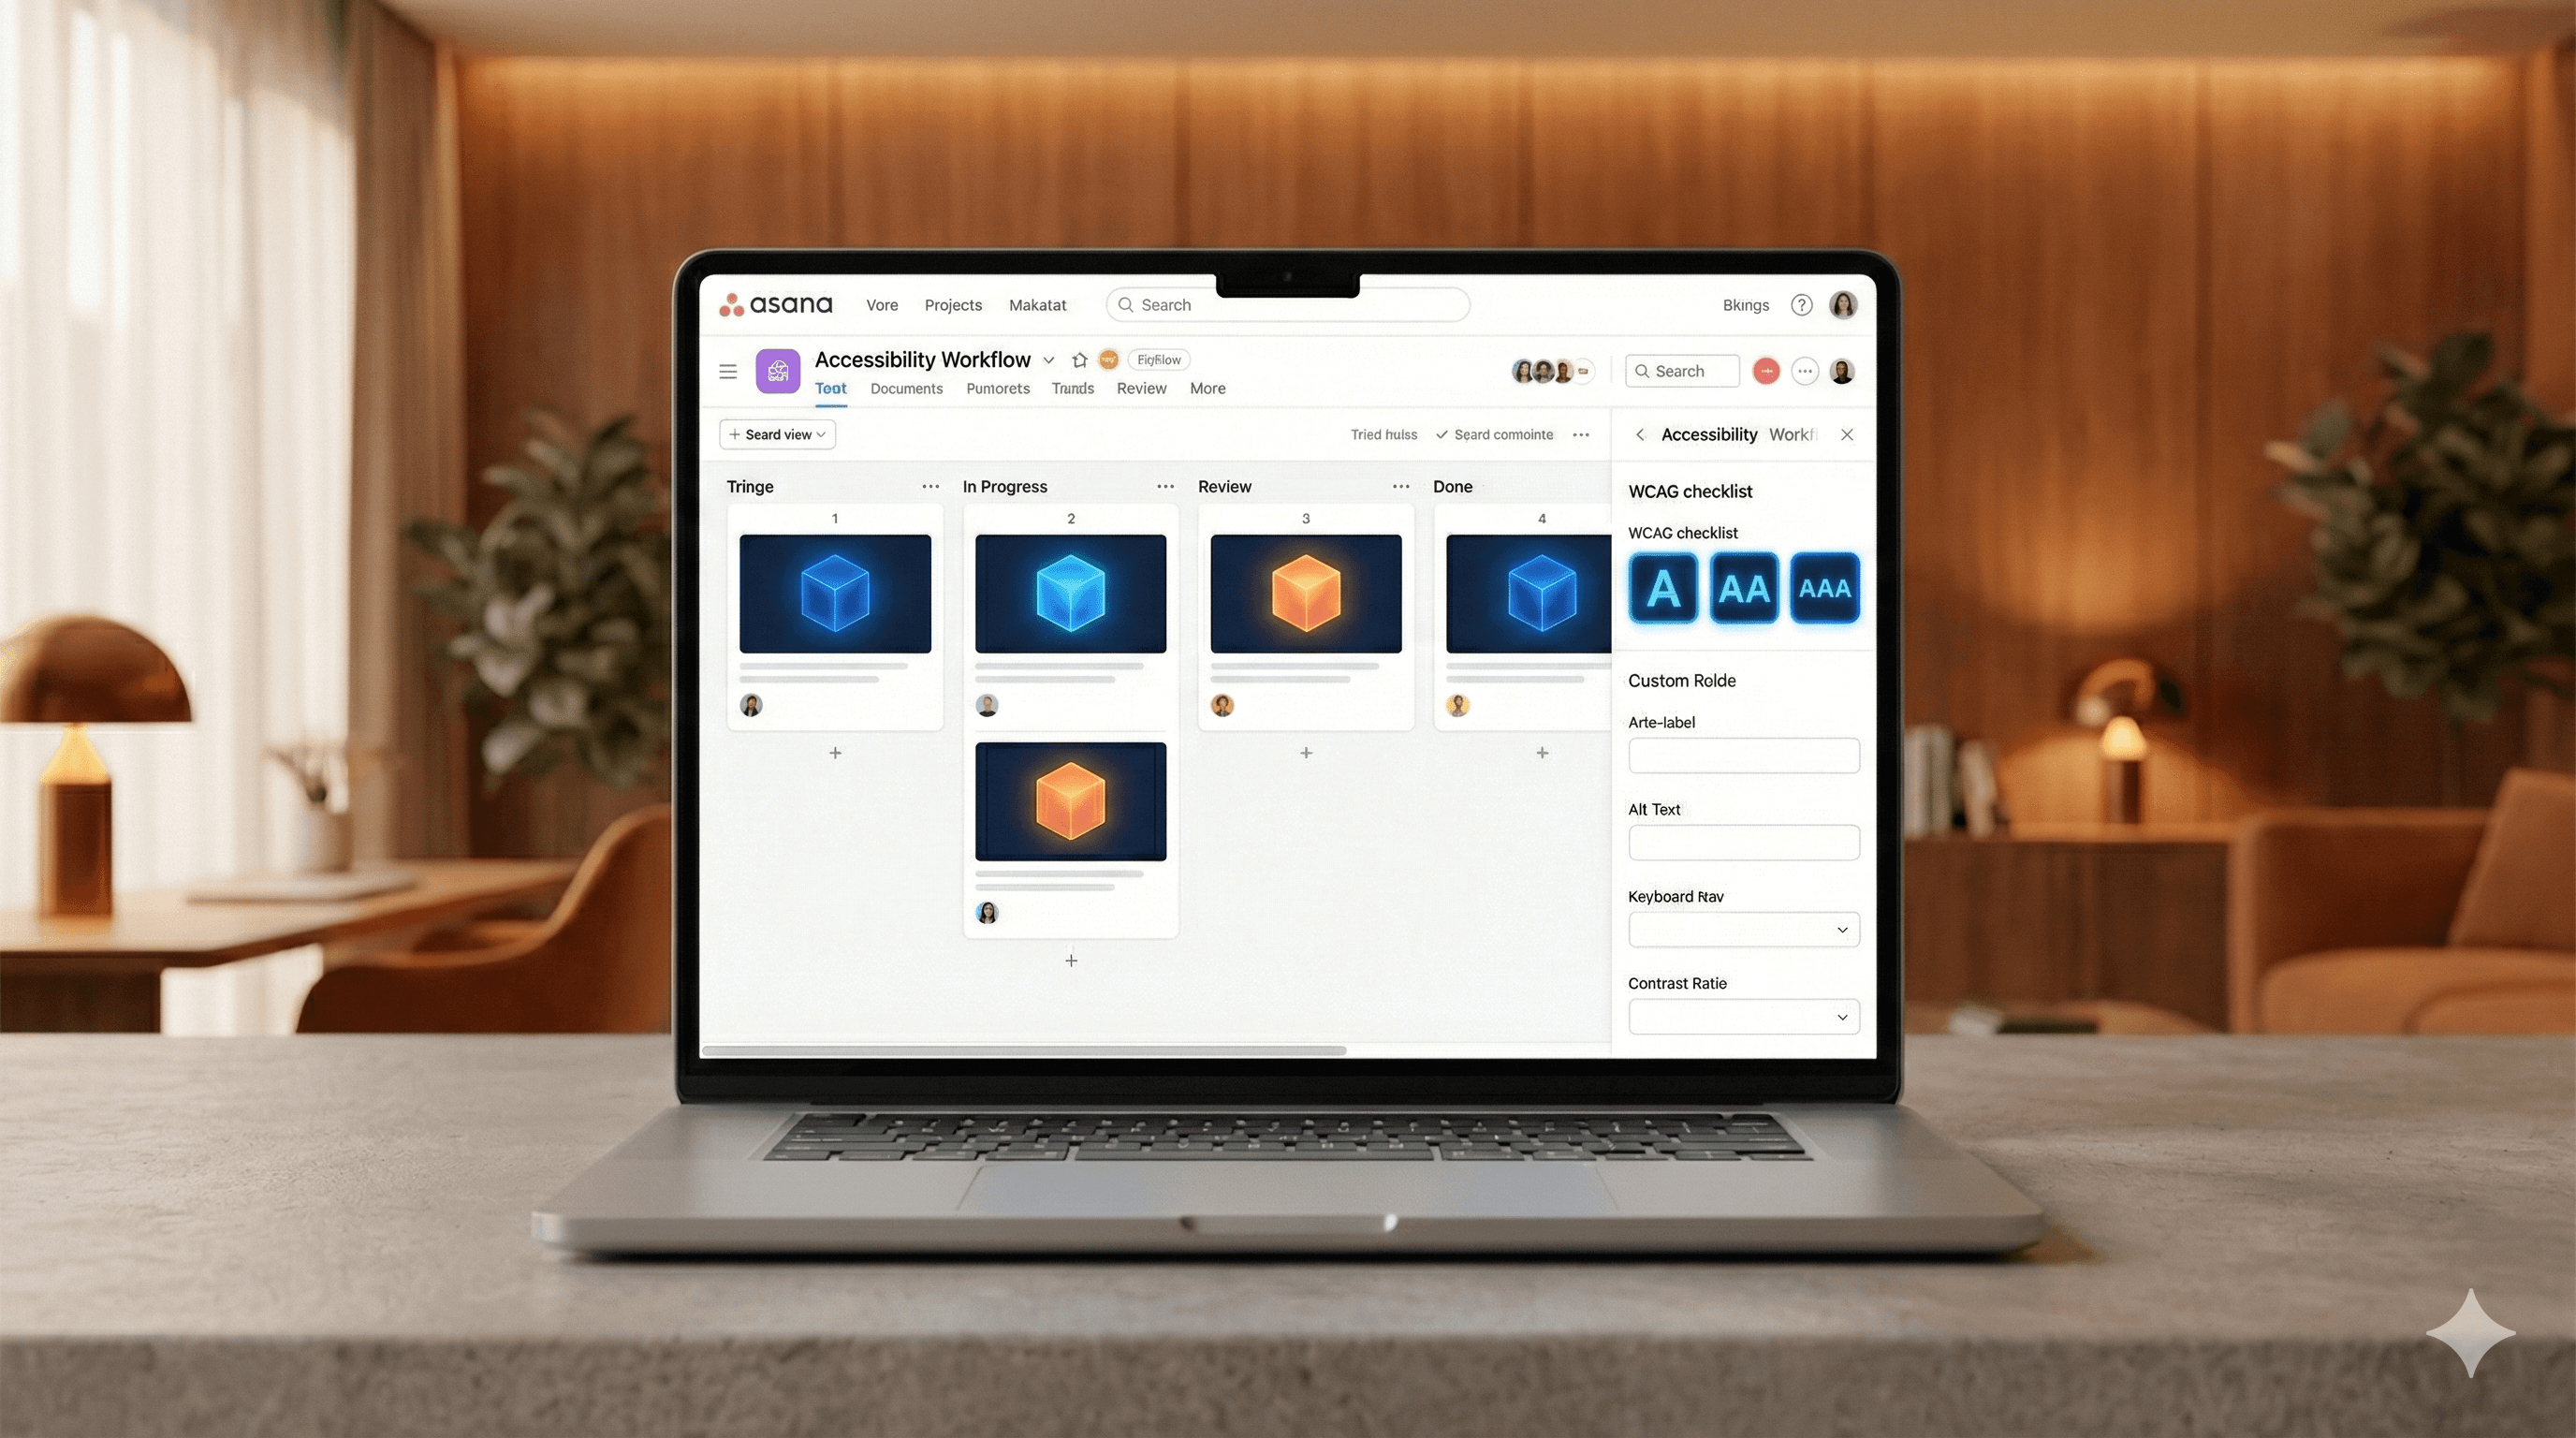
Le flux de travail principal dans Asana
Créer un tableau d'accessibilité
Colonnes : À tester, Problèmes trouvés, En cours, Prêt pour vérification, Fait.
Modèles : « Navigation au clavier », « Formulaires & étiquettes », « Contraste des couleurs », « Sémantique du lecteur d'écran ».
Utiliser des champs personnalisés pour la précision
Zone : Composant/Page (ex. « Passage à la caisse – Formulaire d'adresse »).
Type de problème : Contraste, Focus, Sémantique, Animation/Mouvement, Légendes de médias.
Sévérité/Impact : Bloquant, Élevé, Moyen, Faible.
Réf WCAG : ex., 2.4.3 Ordre du focus, 1.4.11 Contraste non textuel.
Statut : Nouveau, Hiérarchisé, Prêt pour correction, Vérifié.
Adopter une liste de contrôle répétable
Clavier seulement : Toutes les actions accessibles, focus visible, pas de pièges.
Principes de base du lecteur d'écran : Repères, titres, étiquettes et rôles appropriés.
Formulaires : Étiquettes programmatiques, messages d'erreur utiles, pas d'étiquettes uniquement en tant que placeholders.
Contraste : Ratios minimums respectés (texte, composants UI, états).
Média : Légendes, transcriptions, alternatives de mouvement réduit.
Accélérer la découverte avec l'automatisation
Effectuer des contrôles automatisés en CI ou localement (linters, tests de contraste, validation HTML). Traiter les résultats comme des signaux, pas comme des verdicts. Créer des sous-tâches Asana étiquetées « Révélations automatisées » pour une hiérarchisation rapide.
Hiérarchiser en minutes, pas en réunions
Utiliser une règle de bref triage : Est-ce bloquant pour l'utilisateur ? Combien d'utilisateurs ? Quelle difficulté pour corriger ? Attribuer une sévérité, un propriétaire et une date d'échéance directement dans Asana. Ajouter une note de reproduction en 2-3 phrases et un clip ou capture d'écran de 10-20 secondes.
Corriger avec contexte
Les ingénieurs lient les changements de code, les designers ajoutent les composants mis à jour et les designers de contenu ajoutent des alternatives de texte. Garder la référence WCAG et les critères d'acceptation visibles dans la description de la tâche.
Vérifier et apprendre
Passer à Prêt pour vérification. Re-tester avec le clavier et un lecteur d'écran. Marquer la tâche comme Vérifiée, joindre des preuves et ajouter une leçon en une ligne à une tâche récurrente « Apprenants A11y » pour les prochains sprints.
Exemples pratiques
Écarts d'étiquettes de formulaire : Un linter signale des entrées sans étiquettes. Le modèle Asana suggère d'ajouter des étiquettes programmatiques et de tester avec un lecteur d'écran. La vérification exige un clip narré démontrant le focus, l'annonce et la récupération d'erreur.
Régressions de contraste : Un transfert de design réduit le contraste du bouton. Le modèle « Contraste des couleurs » inclut une vérification rapide des ratios et des tokens alternatifs. La vérification nécessite des captures d'écran avant/après avec ratios mesurés.
Problèmes d'ordre de focus : Une modal s'ouvre mais le focus reste en arrière. Le modèle « Navigation au clavier » contient des liens vers des directives sur le piégeage et la restauration du focus. La vérification nécessite de parcourir et de fermer via le clavier.
Conseils pour des résultats plus rapides
Inclure la liste de contrôle dans votre définition de Terminé.
Gardez les tâches petites; divisez les problèmes multi-pages en tâches séparées.
Définir par défaut les dates d'échéance au prochain sprint.
Ajouter une section liste des urgences sur le tableau pour les éléments critiques, bloquant pour l'utilisateur.
Examinez un petit échantillon avec un lecteur d'écran chaque semaine – même 15 minutes révèlent des schémas récurrents.
Mesurer le succès
Suivre :
Temps de hiérarchisation : De « Trouvé » à « Hiérarchisé ».
Temps de vérification : De « Prêt à corriger » à « Vérifié ».
Taux de récurrence des problèmes : Fréquence de retour du même type de problème.
Couverture : Pourcentage des flux clés testés mensuellement.
Une diminution régulière du temps de vérification et de la récurrence montre que le flux de travail porte ses fruits.
Pour commencer
Créez le tableau, ajoutez les champs personnalisés, pastez la liste de contrôle et effectuez une heure de tests sur un flux à haute circulation. À la fin de l'heure, vous aurez une liste classée des problèmes, des propriétaires et des dates d'échéance - tous visibles, tous en mouvement.
Besoin d'aide pour mettre cela en œuvre ? Generation Digital peut configurer les projets Asana, les champs et modèles adaptés à vos objectifs de produit et de conformité.
FAQs
Comment cette méthode améliore-t-elle le test ?
Elle convertit les directives WCAG en tâches claires, ajoute une automatisation légère pour saisir les gains faciles, et utilise une hiérarchisation disciplinée pour que les correctifs progressent rapidement de la découverte à la vérification.
Quels sont les avantages des tests d'accessibilité plus rapides ?
Les utilisateurs rencontrent moins de blocages, les équipes observent moins de régressions, et les leaders acquièrent visibilité sur les risques et les progrès - tous facilement intégrés dans Asana.
Ces méthodes peuvent-elles être appliquées ailleurs ?
Oui. Le modèle de liste de contrôle et de hiérarchisation fonctionne dans n'importe quel outil de suivi ; la force d'Asana réside dans sa simplicité, ses modèles et sa visibilité à travers les équipes.
Les outils automatisés remplacent-ils les tests manuels ?
Non. L'automatisation détecte des schémas communs ; les tests manuels avec clavier et lecteurs d'écran confirment l'utilisabilité réelle du monde.
À quelles normes cela s'alignent-il ?
Principalement aux critères de succès de WCAG 2.2, avec un accent sur l'ordre de focus, la sémantique, les étiquettes et le contraste.
Recevez chaque semaine des nouvelles et des conseils sur l'IA directement dans votre boîte de réception
En vous abonnant, vous consentez à ce que Génération Numérique stocke et traite vos informations conformément à notre politique de confidentialité. Vous pouvez lire la politique complète sur gend.co/privacy.


Génération
Numérique

Bureau du Royaume-Uni
Génération Numérique Ltée
33 rue Queen,
Londres
EC4R 1AP
Royaume-Uni
Bureau au Canada
Génération Numérique Amériques Inc
181 rue Bay, Suite 1800
Toronto, ON, M5J 2T9
Canada
Bureau aux États-Unis
Generation Digital Americas Inc
77 Sands St,
Brooklyn, NY 11201,
États-Unis
Bureau de l'UE
Génération de logiciels numériques
Bâtiment Elgee
Dundalk
A91 X2R3
Irlande
Bureau du Moyen-Orient
6994 Alsharq 3890,
An Narjis,
Riyad 13343,
Arabie Saoudite


Numéro d'entreprise : 256 9431 77 | Droits d'auteur 2026 | Conditions générales | Politique de confidentialité